I Made a Flappy Bird Game
in 10 minutes (No-Code)
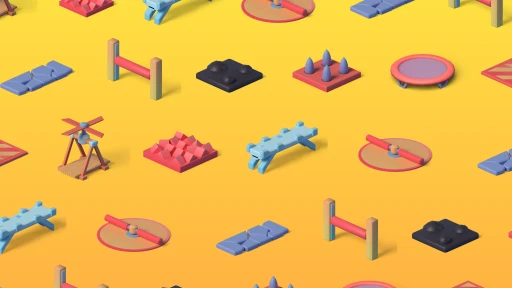
Soba is a versatile game-creation tool that works across iOS, Android,
and PC platforms . The best part? You dont need any coding experience to make games with Soba. All of the building
in Soba is done using a variety of pre-made assets along with our innovative behavior blocks.
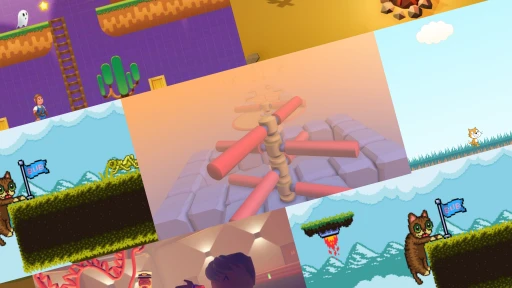
Not only can you create your own games, but you can also play a wide array of games that others have created. Some
examples include:
-
Haunted Dungeon : A narrative adventure where you must escape from ghosts.
-
The Droppers : A game where you drop through various colorful levels of obstacles to
reach the bottom.
-
Utter Uprising : An action-packed survival game where you must fend off waves of evil
cows.
-
Box Simulator : A simple yet satisfying game where you have to click on the most
boxes
Now that youre familiar with Soba, lets dive into creating our very own Flappy Bird game. We did it in just 15 minutes.
Here’s how.
Create Your Flappy Bird Game in Soba
Lets get started creating your Flappy Bird game with Soba. With this style of game, the user will control a character
that mostly runs but can go into a “flappy mode” to fly bird-style over obstacles. Here are the steps to lead you
down the path of creating your first game:
Start From Scratch
On startup, hit the Create button and select Start from
Scratch . This will place you in an empty world.
Once youre in the editor, start by play-testing your game to familiarize yourself with the controls. Press the Play button. Youll see that once your character is spawned in, youre able to move around the
area, jump, and dash.
Add Behaviors
In Flappy Bird, the camera scrolls sideways with the player. To fix this effect, we need to add what we call
behaviors. Click on your player spawn plate and select the option to create a new behavior. This will take you straight
into the behavior editor.
The behavior editor in Soba simplifies programming concepts into puzzle-like pieces. Snapping these pieces together lets
you create commands, actions, and reactions.
To make our camera move side to side, first, add a trigger “Player Enters” which runs when the player enters the
game. Next, go into the effects category and find a block that says "Set Player Camera." Drag it under the
trigger you just made.
Some blocks have an arrow on the side of them. By clicking on this arrow, youll see a drop-down menu with more details
and ways to customize the block. In this case, select Sidescroller for the players
camera mode.
Once youve done this, exit the editor.
When you playtest the game, youll see that the camera is now fixed in one direction.
Scroll Automatically
Now that we have the camera movement down, lets get it to scroll automatically. We need a way for our characters to move
forward without player input and prevent them from returning.
For this, go back into the behavior editor of your player. You can either make a new behavior or modify the existing
one.
Use Event Blocks
To ensure this behavior runs every time the player spawns, we use what we call event blocks. These are used to send
information across the game. Assign a name to an event block, and any other event block with the same name can
communicate with it.
For example, we’re going to attach a red “Plain Event” block to our tree and go into the drop-down portion of
the block to set its name. For instance, name it "spawn."
Then create a blue “Plain Event” block under Triggers and also name it "spawn." Remember, these blocks
are case-sensitive, so make sure the names match exactly.
The new trigger marks what will happen whenever a “Plain Event” by the same name is sent. Next, find the
“Wait” block under Game Objects and set the value to 0.5. This gives our game time to reload.
In the drop-down menu, set the move direction to 90°, indicating that the character must always move to the right of
the screen. Increase the duration to ensure that the event keeps running.
If your character moves back and forth rather than left and right, click on the spawn plate and rotate it by 90°. Your
character should now move correctly.
Set Up Jumping Mechanism
Next, lets set up our jumping mechanism. Well use a collision box in the asset bar on the right-hand of your screen to
add a behavior to it. To place the box, you can click and drag or select an asset and click where you want to place it.
The button to the right will allow us to move the object, and the arrows will allow movement in one direction.
Now, replace the existing behavior with a new one. This will create a button that, when clicked, makes the character
flap.
Create a Player Enters trigger and place an “Attach To Player” block found under “Object Actions”. Change the
values of x, y, and z offsets to 0-0-1 so our box is at the same ground level as the player and directly in front of
them. We recommend setting the duration to 10,000 and then unchecking the box below it.
Create the Flapping Effect
To create a flapping effect, we need to create an ”Interaction” trigger that runs whenever the player clicks on the
object in the game. Then, under that, add a “Launch Player” block found in ‘Game Actions.’
The “Launch Player” block also has a value for impulse that we can adjust. If we keep it at 10, our player will
simply jump when we click the screen, but if we want to create something reminiscent of flapping, we should bring the
value down to 5.
Your character can now get their flap on. This is the basic mechanic of a Flappy Bird game. Now it’s time to add in
the fun stuff!
Add Obstacles
Let’s add a reason for characters to flap. So, we’ll need to create obstacles for the player to jump through.
Create a behavior on your first obstacle and add a trigger for when the player touches the object. Simply add a block
that kills the player and then one that respawns them.
If you test it out, you die upon touching the obstacle.
But youll notice that your character isnt moving on its own. Now, the “Plain Event” comes back into play. Add a red
“Plain Event” block to your obstacle and rename it "spawn."
This will send the same event from before to our character upon killing us. Now, every time we spawn, well be moving
forward. If you have any issues here, make sure you recheck the “Wait” block we mentioned earlier.
Duplicate Your Obstacle
Duplicate your obstacle by clicking the button on the left-hand side and then click where you want it.
All newly created objects will have the same behaviors as the original. You can also go into each behavior individually
and copy them to any object.
Scale your objects up and down to add more of a challenge to the game. Do this using the button to the left.
Arrange your obstacles however you want and change their colors to your liking. You should now have a character that can
flap and plenty of obstacles for them to flap over, under, and around.
What’s next?
Let your players have points!
Add Scores
Click the button in the top left corner, select Game Rules , and enable Scores and Leaderboards . Now, scores should be active in our game. However, we still need a
way to increase our score.
Place a collision box between your first set of obstacles. Create a behavior that increases our score when we pass
through it. It needs a trigger for when the player touches the object and a block to add the score.
Duplicate the new score boxes and place them between the obstacles. At the top of the screen, you should now see a score
accumulating as you play through. To make sure the score resets when we die, add a block that sets the score to zero in
the player behavior where we defined the event.
Create Game Loop
We now need two things. We need a way to loop our game and a way to end it. Add another Collision box at the end of the
game. Use the “ Set Player Position” block and set the values 0, 5, and 0.
Include an object that the player can touch to manually end the game. This way, their high score will be logged on the
leaderboard. Place an object of your choice, create a behavior, add a player touch object block, and finish it off with
the end-game block.
Optional Finishing Touches
For an optional finishing touch, you can create a trail on our player that you add to your very first Behavior. Go to
the effects category and find the “Player Trail” block. Under the drop-down, you can customize your trails color,
shape, duration, and offset.
You can also go back and add whatever details you want to your background and give your game a unique look.
Congratulations! Youve built your own Flappy Bird game using Soba in under 15 minutes. Test out your game , adjust as needed, and enjoy playing!